Hi everyone, welcome to the new XLing Labs site. This should be a flexible new framework for the lab and its members to highlight new work and documentation. It’s also a good place to put common information like scheduling!
In this document I’m going to break down some of the basic actions you can do to expand this website. We’re going to cover, first, how you can edit an existing page on the website and later, we’ll discuss how you can add whole new pages.
Editing an existing page
Editing an existing page is very very easy! Every editable page should have have a button that says Suggest Changes at the top of the page. When you click that button you will be directed to the website www.github.com
. Github is what’s called a ‘version control system’ and its job is to make sure that people can easily edit one part of a document or program without making changes to everything else.
If you want to suggest changes to a document you should make an account on Github and, when you’re ready, you can make your edits in your browser after clicking the edit button:
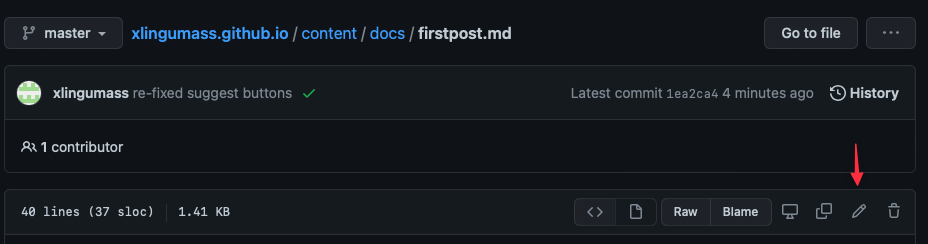
Adding text should be easy as pie in markdown, but there are some advanced features that you can use when writing markdown in this environment. If you go to source for this page on Github
now you can see for instance special commmands such as [\{\{<fa arrow-up-right-from-square>\}\}](http://github.com). These are called shortcodes, and for more information on the general use of Markdown and the use of shortcodes on this website please refer to the markdown style guide .
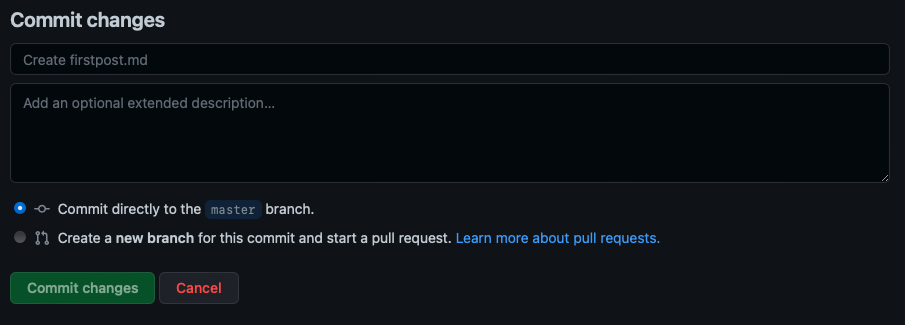
After you’ve added your suggestions to an article file, be sure to fill out and complete the ‘commit form’ or else your progress will be lost. Once your submission is made your suggestion will be approved and added by your lab manager (be sure to reach out to them as well as commit notifications can get lost in the email box).
Adding a new page
Okay, so you’ve edited some existing files and you wanna move on to bigger and better things. Adding a page is a more advanced task for sure, but it’s certainly do-able. You’ll need to install Git on your computer console, you can find tutorials on how to do that here . Back on the the Github page for this website you want to find to find the button to ‘fork’ the project at the top of the page:

After you fork the code, your Github account should now have its own copy of the code from the day that you forked it. If you go on your profile for Github you can see all your repositories. You should find the forked repository and copy its link, for example mine is: https://github.com/tgmorton/xlingumass.github.io. You’ll need that link later. Now that you’ve installed Git and forked the repository, you’re ready to download it and make changes.
To do that go into your terminal and have the link to your forked repository ready. Type the following commands (after $>), replacing my fork link with your fork link, into your terminal:
$> git clone https://github.com/tgmorton/xlingumass.github.io
$> cd xlingumass.github.io
Okay, now that you’ve downloaded the files and put your terminal in the proper directory (cd means ‘change directory’), you can open up the folder in your file explorer. Below I’ve put a picture of my file explorer and higlighted the folders that concern you.
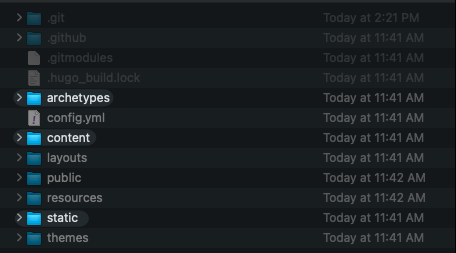
archetypes contains templates and examples that you can use when making your own document, the initial code wrapped in --- --- is called the ‘front-matter’ you can learn more about the front-matter and how you can edit it to change how the document appears on the website here
. content contains all of the write-ups that are then displayed as posts on website. Posts are made from .md files, which of course examples of can be found in the archetypes folder. Finally, for more advanced projects the static folder determines what gets pushed to the website when it is constructed. If you need to insert images into your document (again see this page ) you want to upload those images to the static/img folder first.
Take a look at all that has been written before to get an idea of what a page looks like in markdown form. When you want to add a new page of your own you simply add a new .md file to the content folder. For now the four folders in there: blog, docs, labs, and schedule shouldn’t be changed but a later article may explain how to do so. Once you’ve added your post and and written your initial content you should go back to your terminal and type in the following commands:
$> git add .
$> git commit -m "write the changes you made in here"
$> git push
If you get an error when attempting to push, type instead git push -f to force it. If you mess up the files that’s okay! You can always delete your version of the repository and start again.
Once you’ve pushed to commit to your repository you should see the changes in your fork reflected on the Github website. Once you feel satisfied with the changes you’ve made you can go back to the Github website and on your forked repository there should be a button that says contribute this allows you to submit your changes to be merged in with the main website. Be sure to tell your lab manager after you’ve done this so they can approve your changes.